One of the most frequently asked questions I receive about my work is how I manage to get my images so sharp!
Blog
9 Tips for Tack Sharp Photos (+ 2 FREE Sharpening Photoshop Actions! )
by Bellevue Avenue on Feb 10, 2017

There are 9 techniques that I bank on to ensure tack-sharp images that I can count on every time, which I am going to share with you here. I'm also including a Tack Sharp Checklist and 2 FREE Photoshop Sharpening Actions below - check it out!

9 Tips For Tack Sharp Photos
(+ 2 FREE Sharpening Photoshop Actions! )
9 Tips For Tack Sharp Photos
(+ 2 FREE Sharpening Photoshop Actions! )
Use a Quality Lens
Use a Quality Lens
If you use sub-par equipment, you will have sub-par images. Nothing can replace a quality piece of glass, and the sharpest lenses out there tend to be prime lenses (in other words, lenses that do not zoom in and out). I always recommend shooting with a high quality, prime lens to achieve tack sharp images.
Some great ones are:
- 35mm 1.4
- 50mm 1.4
- 85mm 1.2
- 135mm 2.0
- 200mm 2.0
If you're strapped for cash, the 50mm 1.4 is a great lens to start with. It's generally affordable. Is a great portrait lens, but also wide enough to capture scenery, and it's very sharp. You can nab this lens for around $350 from Canon and $415 from Nikon.
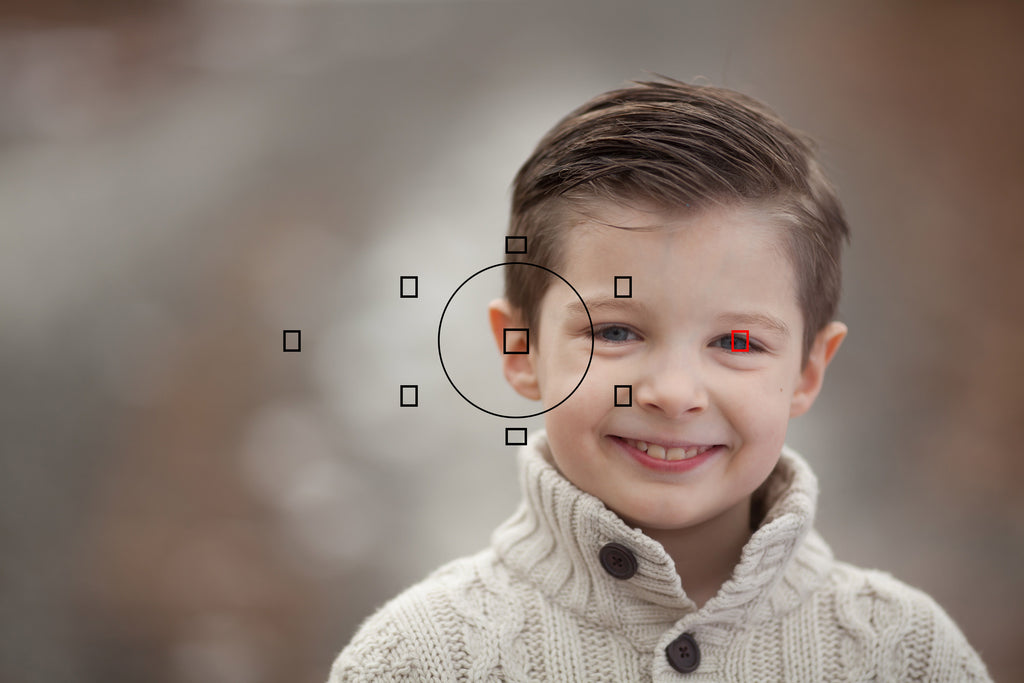
Focus on the Pupil
Focus on the Pupil
When choosing your focus point, focus on the pupil. The eye is the window to the soul and you want to draw the viewer in with the eyes. Don't miss this opportunity, leaving the centerpiece of your image blurry or out of focus.
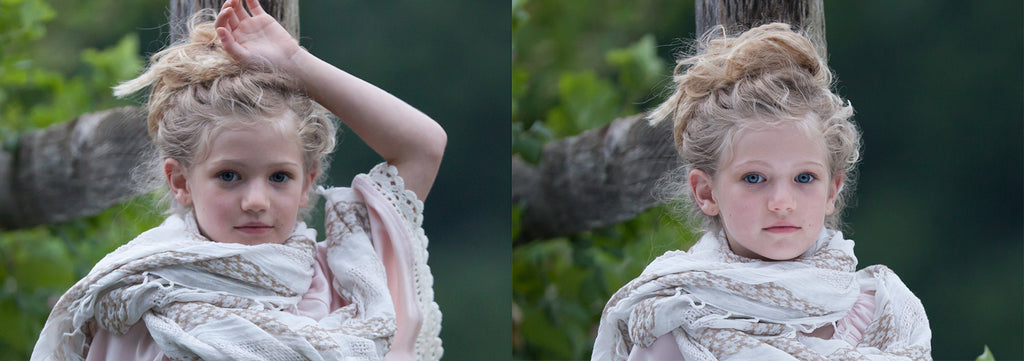
Proper Exposure
Proper Exposure
Make sure to nail that exposure for the best clarity and sharpness possible. If your image is too underexposed, you will lose clarity when trying to brighten it post processing. Trying to recover underexposed images will leave your details grainy and muddy. For the best clarity possible, expose properly, or slightly overexpose (by one stop). When you bring it down in Photoshop, you will find much clearer, cleaner sharpness in your images. Here's an example of the degraded clarity from underexposure (LEFT) compared with properly exposing or slightly overexposing then correcting (RIGHT).

Set your Shutter Speed to 3x's the Focal Length of your Lens
Set your Shutter Speed to 3x's the Focal Length of your Lens
Ok, right-brainer - don't let the numbers turn you off! This is actually pretty simple. Just follow me for a minute!
In order to reduce shake/blur when hand-holding your camera, set your Shutter Speed to 3 times the focal length of your lens.
For example, if I'm shooting with a 50mm lens (the lens' focal length is 50), I will multiply that by THREE, and use that number to set my Shutter Speed.
50mm x 3 = 150 Shutter Speed
So, I set my Shutter Speed to a minimum of 150 ss
What does this do? It's going to reduce hand-held blur and give you sharper results. I use this every time I shoot and it has transformed my image quality.
Back Button Focusing
Back Button Focusing
Another thing that has absolutely transformed my image quality is back-button focusing. So what is back button focusing? Back button focusing allows you to quickly set your focus while looking through the view finder, reducing the chance of missing focus during a shoot. I'll be honest, when I first heard of BBF, I thought, "I don't have time to learn that right now!" and put in on the back burner. Oh, how I wish I had learned it sooner! Being able to toggle my focal points while viewing my subject (rather than looking down at the back of my camera, and missing valuable shots), was a game-changer. Each camera has different steps to set up Back Button Focusing, so I suggest that you Google your camera model + back button focusing instructions! And don't wait as long as I did!
Elbows In
Elbows In
Start viewing yourself as a biological tripod! :) Keeping your elbows in and firm while you shoot gives greater support and reduces shake/blur. Plant your feet while, shove those elbows in and shoot!
Use a Reflector
Use a Reflector
Using a reflector to cast light upon the face adds more clarity to your images. We suggest using a simple pop-up circle reflector or a white polystyrene board (my fave). Here is a zoomed in example of the clarity without a reflector (LEFT) vs. with a reflector (RIGHT). Big difference, right? This is why I heart reflectors.
Shutter Release Upon Exhale
Shutter Release Upon Exhale
Another way to reduce shake is to click the shutter release upon exhale, rather than while you breath in. When I shoot, I lock in my focus (eh hem...on the eye ;) ), then exhale gently, hold that exhale and take the shot. Shooting upon exhale further solidifies your "tripod" stance, and prevents your camera from bobbing up and down as you shoot.
Sharpen in Photoshop
Sharpen in Photoshop
I always bring that final touch of sharpness to my image in Photoshop. Ideally, you are working with full size images, around 5616 x 3744 in size when editing (give or take).
First, I do a general sharpen of my image using the following steps:
Overall Sharpen Steps:
- Create a blank layer (Layer > New > Layer)
- Merge Visible (Shift + Ctrl + Alt + E)
- High Pass Filter (Filter > Other > High Pass) at 2.0 Radius
- Change Layer Blend Mode to Soft Light
Then I do a targeted sharpen on the eyes only, using the following steps:
Spot Sharpening Steps:
- Create a blank layer (Layer > New > Layer)
- Merge Visible (Shift + Ctrl + Alt + E)
- Unsharp Mask (Filter > Other > High Pass) with the following settings:
- Amount: 90
- Radius: 2.0
- Threshold: 0
- Create a Black Layer Mask to hide the effect (Layer > Layer Mask > Hide All)
- Then using a soft, white brush, paint on the black layer mask over the areas of your image you would like to spot sharpen (eg. eyes, lips, etc.)
When you combine all of these tips, you'll instantly find that your images are clearer and sharper than ever before! Happy Shooting (and sharpening! ;) ) ! Do you have any tips for sharper photos? Share them in the comment section below!
BONUS!
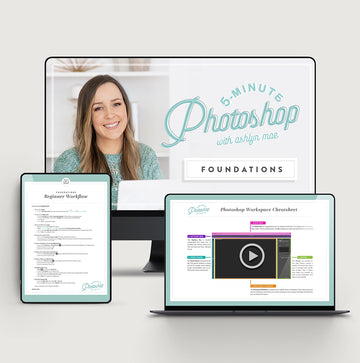
I created a special action that does exactly what I described in the previous two steps to speed up the process for you, as well as a printable "Tack Sharp Images" checklist for my readers!
FREE Tack Sharp Photos Bundle
(Download)
Included in our FREE Tack Sharp Photos Bundle is: Free Sharpening Action, Video Tutorial and Tack Sharp Photos Checklist!
By entering your email, you are subscribing to Bellevue Avenue's personal and promotional marketing email list. If you are a member of the European Union, in the first email, you will be given the option to opt-in to our regular marketing emails after the launch sequence is over. If you choose not to, you will not receive any more marketing or promotional emails after this sequence is complete.
Tags:
Related Articles